Ghidra -- A quick start guide with pictures and a C++ example
The NSA recently released Ghidra, a powerful open source software reverse engineering tool. Since the release I have played around with Ghidra for a number of hours and found it to be pretty comparable to existing tools that are used for software reverse engineering. I have also read a number of blog post and articles that try to compare Ghidra to these other tools, especially Ida Pro. I don't want to try to make comparison since every tool in the RE space has it's own advantages and disadvantages. Instead, I wanted to concentrate on guiding someone with getting Ghidra setup and provide a quick example. If doing a straight comparison between tools, Ghidra does basically everything any other RE tool does, however each tool has a unique way to display information to the user. Knowing how to quickly use and interpret that displayed information to come to a conclusion is the advantage of one tool over the next. This really comes from experience, and I think that's the advantage the other tools have over Ghidra at this time.
Getting Started
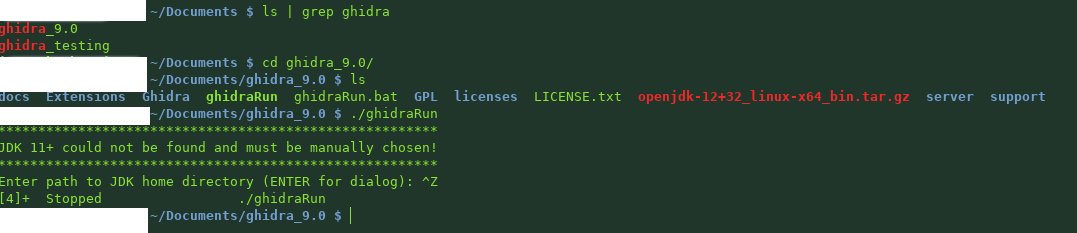
First I will explain my environment, you would need to adopt this to current versions or systems you might be using. To download Ghidra head over to https://ghidra-sre.org/. Ghidra is built with Java and the current version 9.0 requires at-least OpenJDK 11. I am using Linux and currently OpenJDK 12. Below is an example of my setup. Starting Ghidra with ./ghidraRun the first time will require you to tell Ghidra where your OpenJDK is located. In my case I extracted the tar into ~/Documents/Ghidra/ with tar -xvf openjdk-12+32_linux-x64_bin.tar.gz
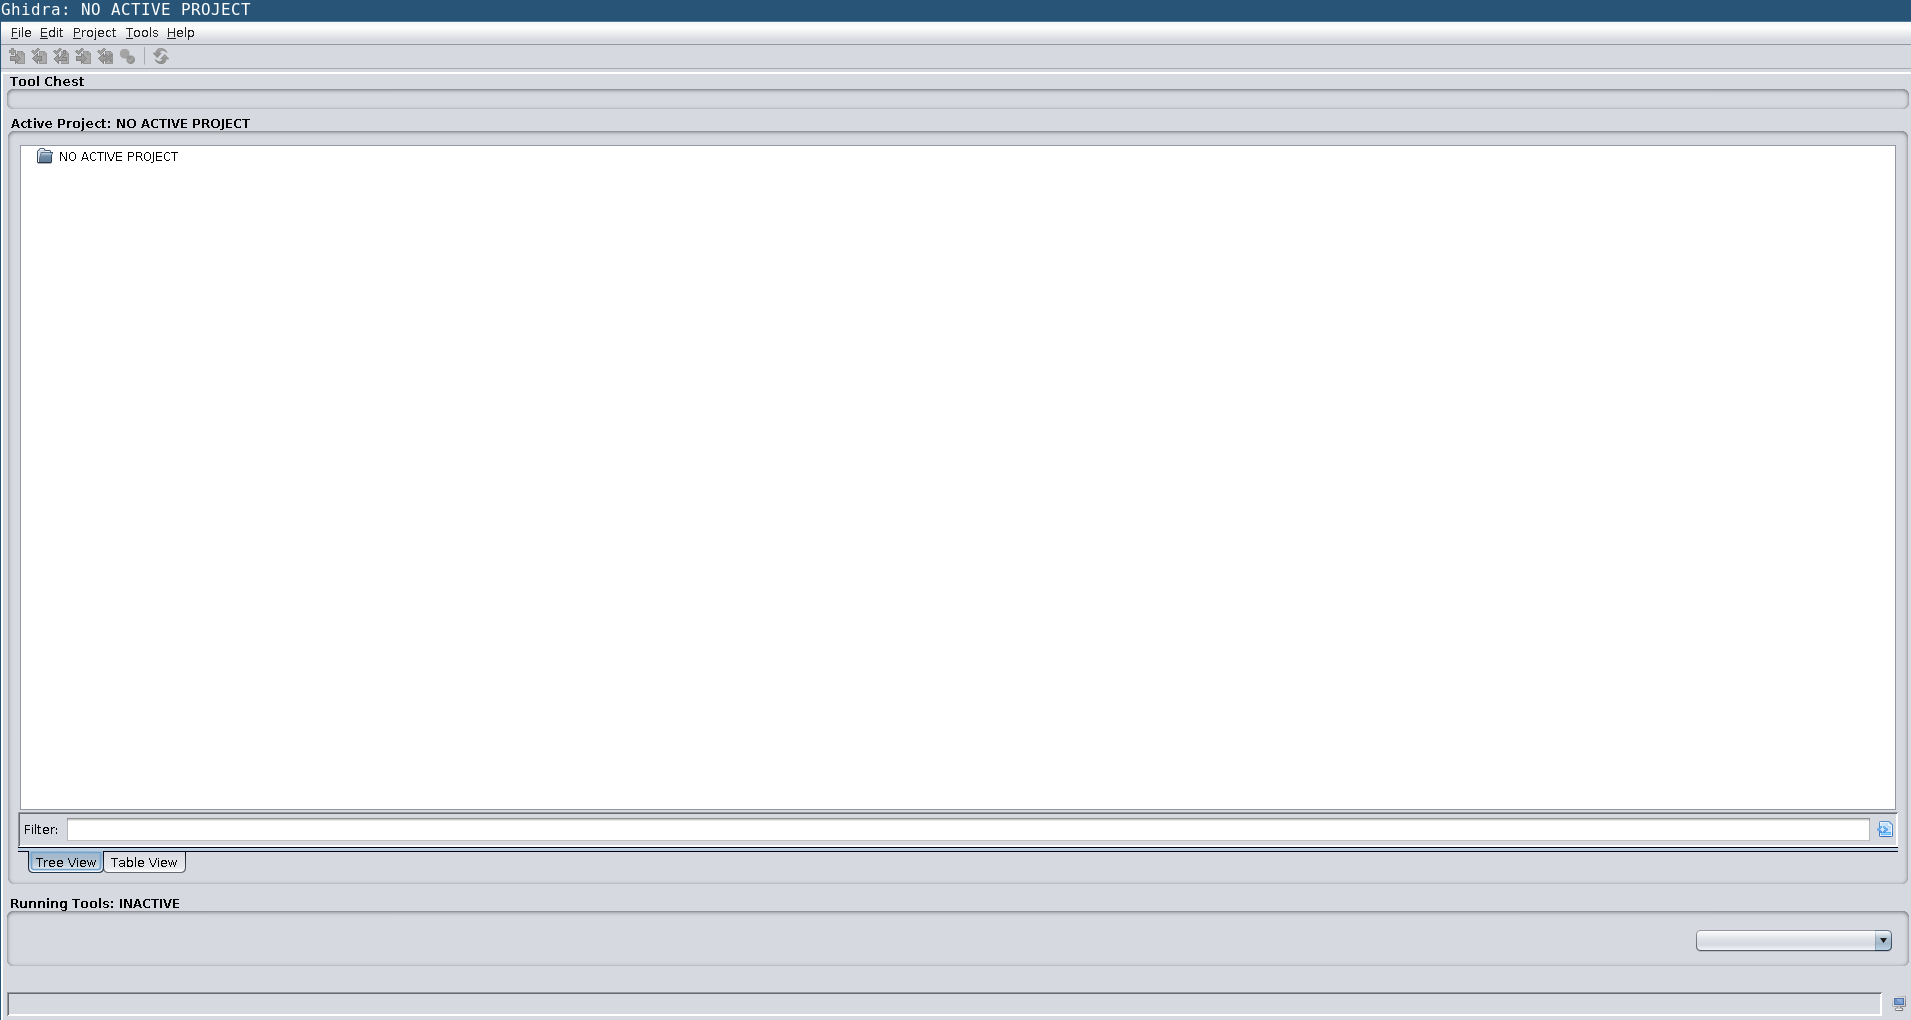
Once you have told Ghidra where you have JDK you should see something similar to the window below.
 .
.
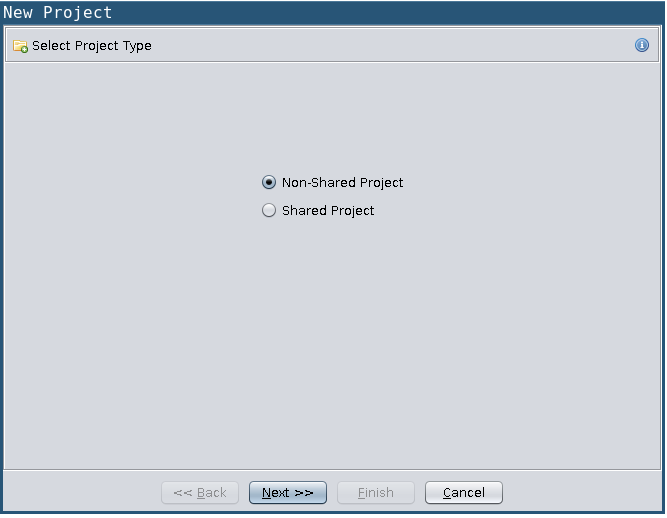
Ghidra uses the concept of workspaces to hold your work. First choose "File->New Project" You have the ability to setup a collaboration project (which is very very cool) or a non-shared project.
You can then create a workspace by choosing "Project->Workspace->add". 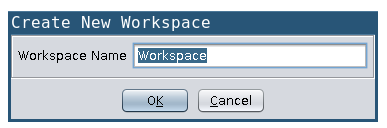 I chose to setup a non-shared project and pointed it to the workspace under ~/Documents/ghidra_testing. After this setup you can click on the dragon head to start the CodeBrowser.
 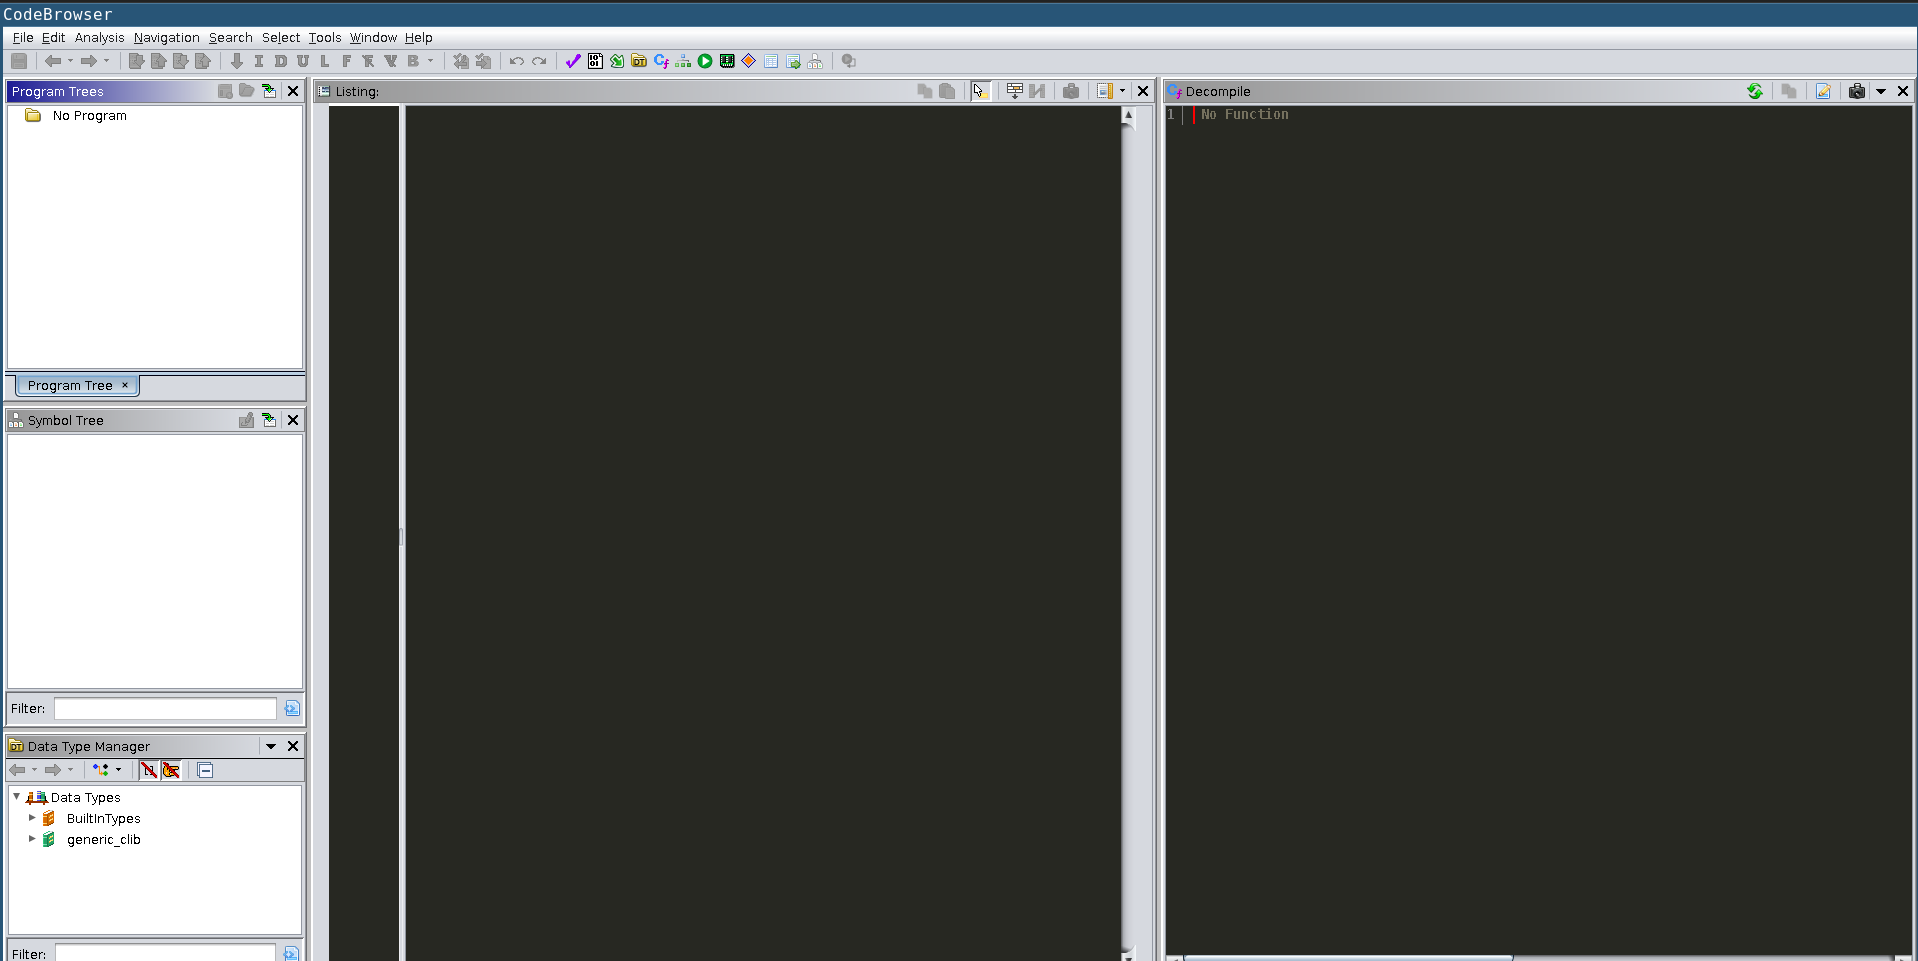 Your screen will look a bit different since I have already setup my color palette. If you would like to change your appearance the settings are under
 "Edit->Tool Options" 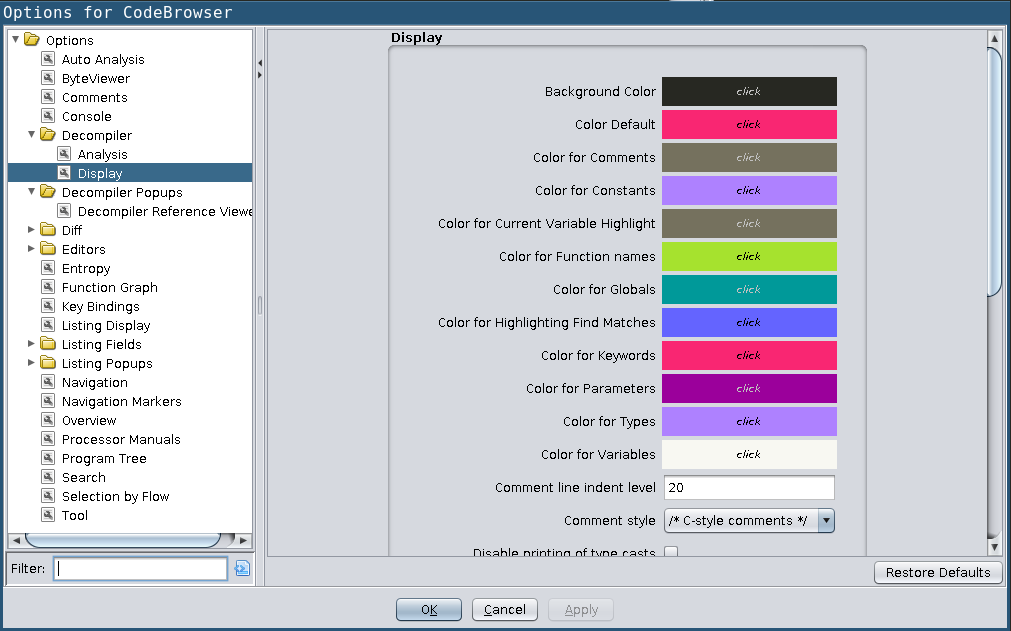
Binary example
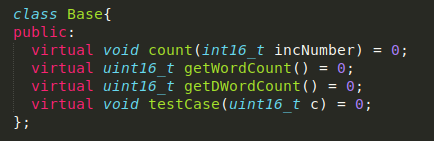
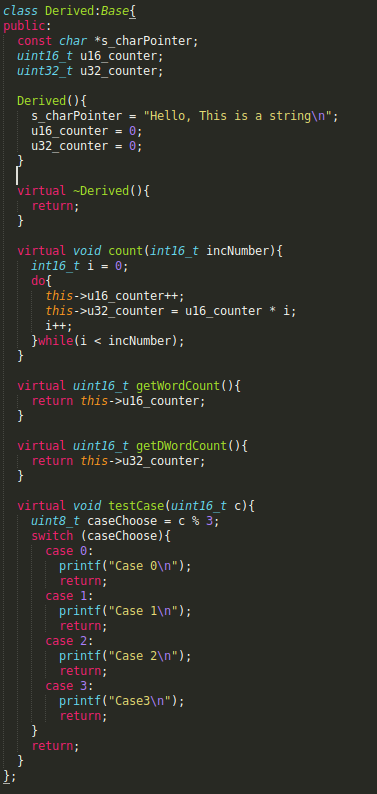
At this point we are ready to start using the tool to do some RE work. First we need a binary. In this example I have created a simple C++ program and have it here:ghidra_test_binary so you could follow along. Let's first take a quick look at the source code so we know what to expect. The file ghidra_test.cpp can be compiled with "g++ ghidra_test.cpp -o ghidra_test". In this code we have a Base class and a Derived with virtual functions. 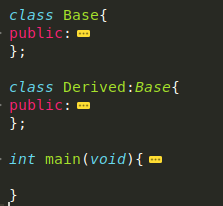
 To view the binary in Ghidra simply press the hotkey
 "I" or go to File->Import and choose the file. Ghidra should recognize the file as an .elf for x86 64 bit processor. Click though the next couple of popup windows choosing the default selections for now and eventually you will see the disassembly. 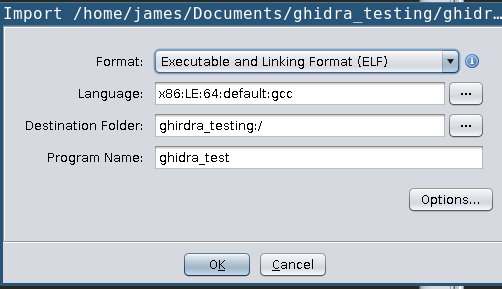
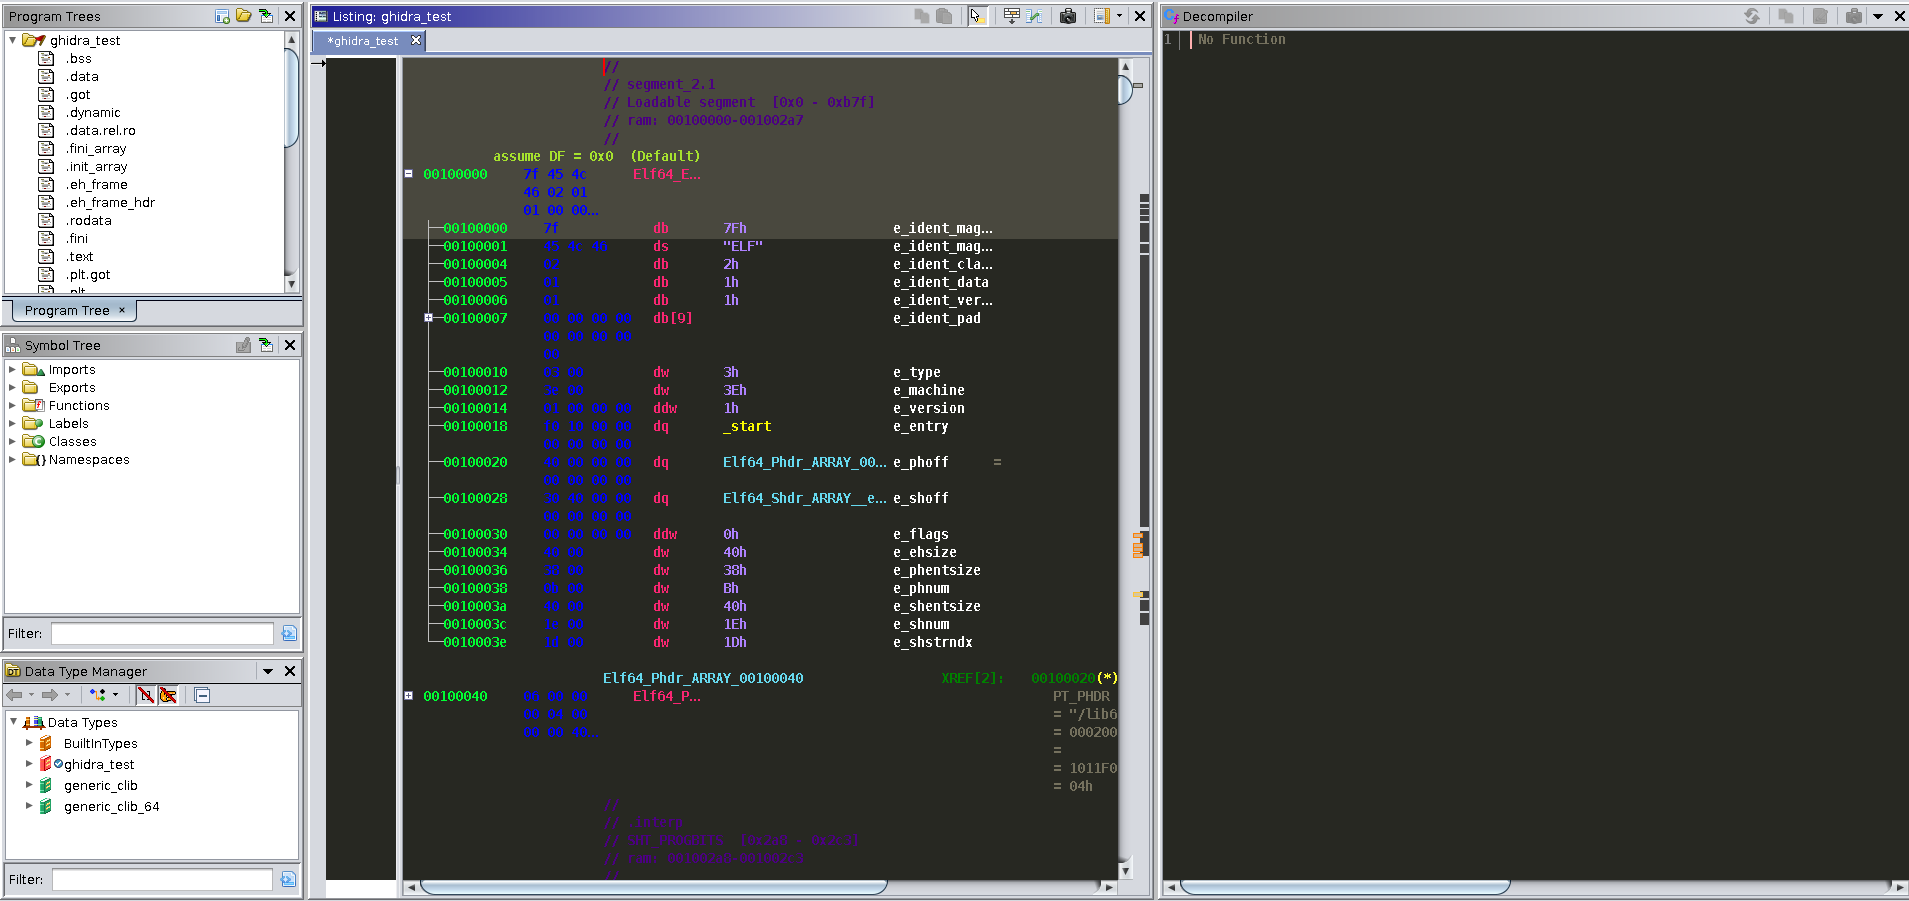 Now we need to find the start of the program. In the "Program Tree" view on the upper left hand side of the window if we click on ".text" the disassembly window and the decompilation window will update. We can now see
 __libc_start_main() and our main(). Highlighting something in either window view will highlight the corresponding in the other window. This is a great feature that will allow the user to see how the decompilation is matched with the disassembly. 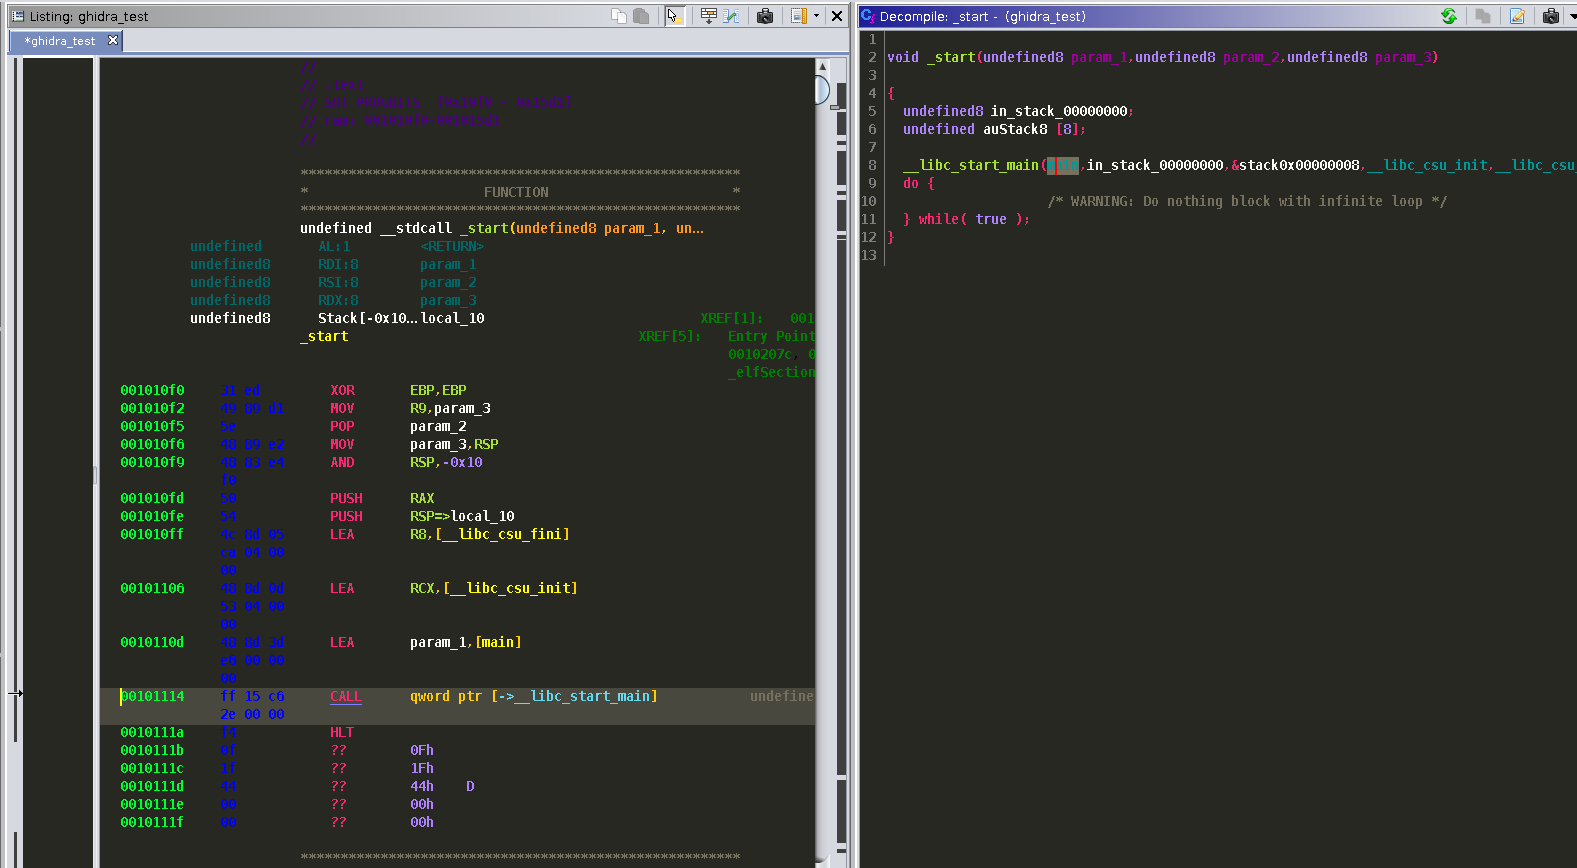 Double clicking on
 main() will update our view with main's code. 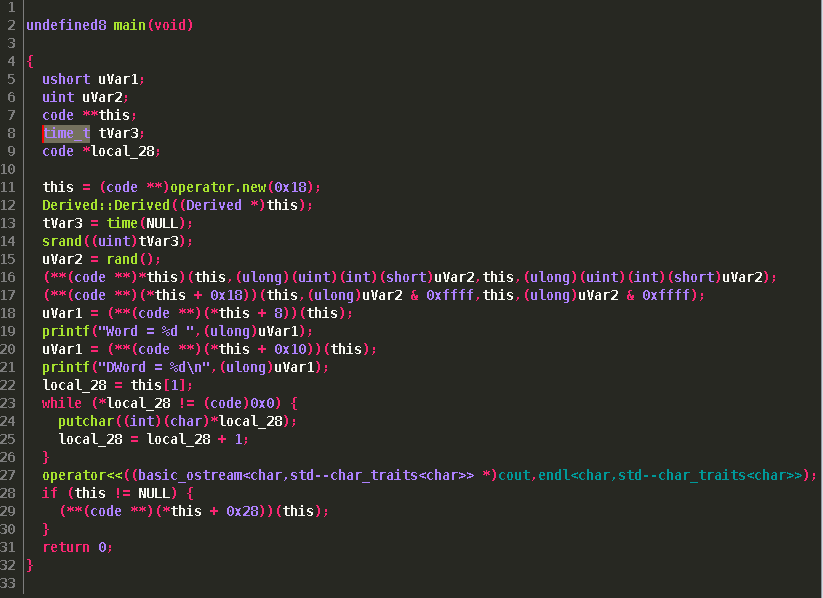 Before we dive in too deep, if we take a look under the
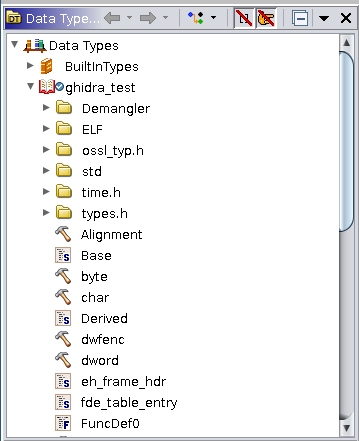
 "Symbol Tree" and the "Data Type Manager" view's we can see that Ghidra has attempted to recognize our some of our class information. It has created a Base and Derived object type under Data Types, and attempted to match the virtual functions under the classes. However, we still need to do a bit of work to make Ghidra show everything correctly. 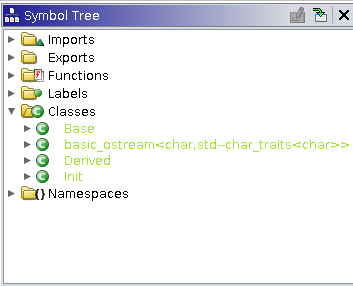
Setting up data structures for our Derived class
First let's work on the Derived class constructor. Double clicking on that call will show our vtable assignment, char pointer, and our u16 and u32 bit variables. 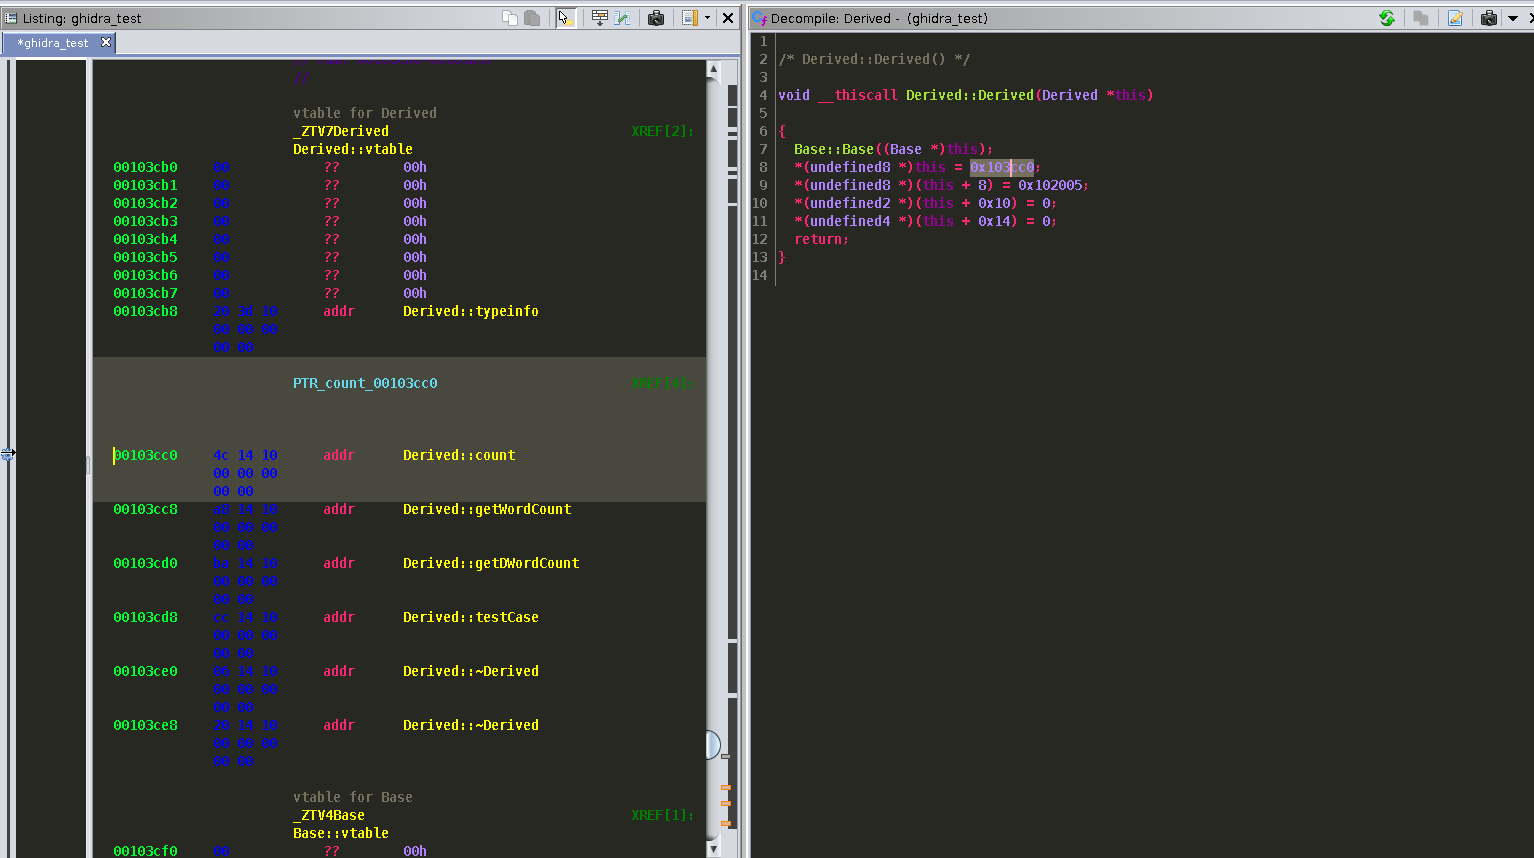 Find the Derived type in under the Data Type Manager window and double click. A new window will pop up which will allow you to edit the structure. Our first entry will be the vtable pointer. Under Data Type double click and type "pointer". Then, add the name vptr under the Name column. Our next entry is our char pointer. This is also a "pointer" type and I called this hello_str under the Name column. Next we have a 16 bit variable which is a "word" type we can call u16_word. We then have to add two undefined types we can add with the "+" icon and then an "int" type at offset 0x14 I called u32_int. We end up with a structure which will look like this:
  Make sure you click the save icon before closing. Checking back with the decompiler view we can see everything looks much nicer. Next let's work on setting up the VTable function calls.
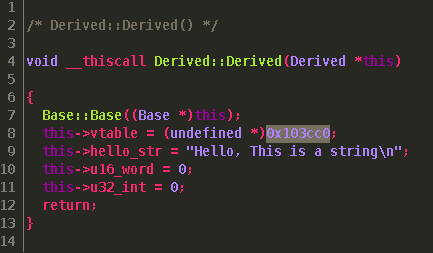
Setting up data structures for our Derived VTable
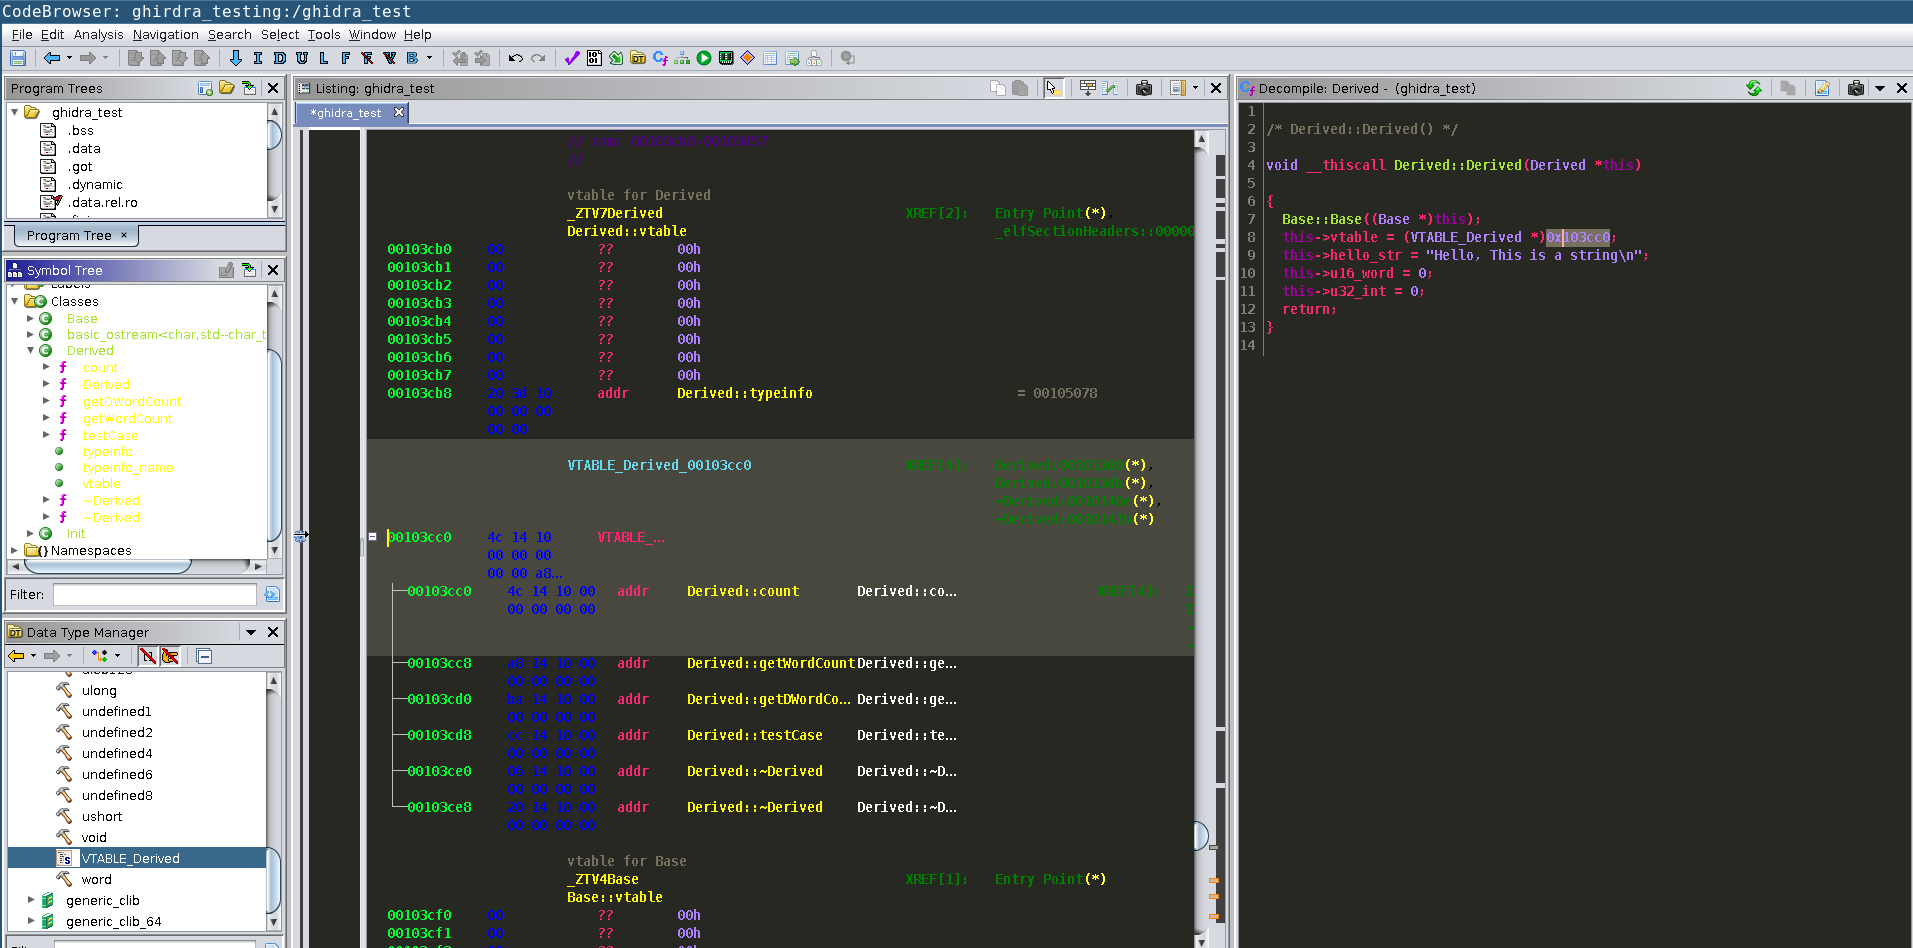
The process for this is similar as the Derived class structure setup. However first we need to add the structure to the types. Right click on ghidra_test under the Data Type Manager and choose New->Structure. Notice we can add other types as well. I have not tried any of these, however Enums are another common type that we can use in the RE process. I will call this structure VTABLE_Derived All of our data types in the VTable will be pointers, if we look in the VTable at offset 0x103cc0, we see it has 6 entries. Since we have symbols associated with those calls we can use those to fill in our names on the VTable structure. In the end it should look similar to below:  We can then apply that structure to the vtable. I found this is an optional step for the most part, but if you wanted to do this you first need to clear out the current types for table. Choose an entry and hit the hotkey
 "C". This will make the space "undefined". Do this for all entries and it will look something like this 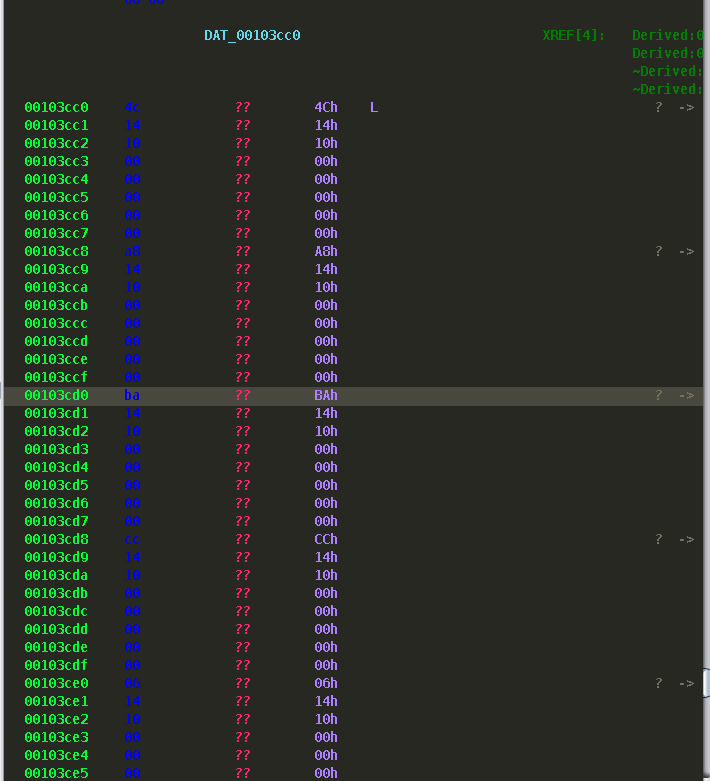 Go to the first address (0x103cc0) and click the
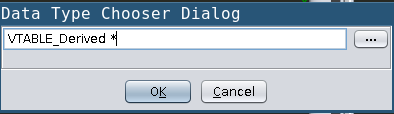
 "T" hotkey and type VTable_Derived. You will see the structure as been applied. We also need to setup a pointer type to this VTable. The name of this will be "VTable_Derived*". This is done by right clicking on the VTABLE_Derived class data type and choosing "New->Pointer to"We then need to apply that to the vptr type in our Derived structure selecting the vptr in our decompilation and clicking the hotkey "Ctl+L. The following is what you should see going though this: 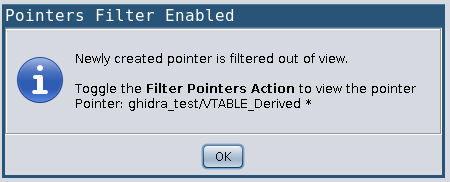
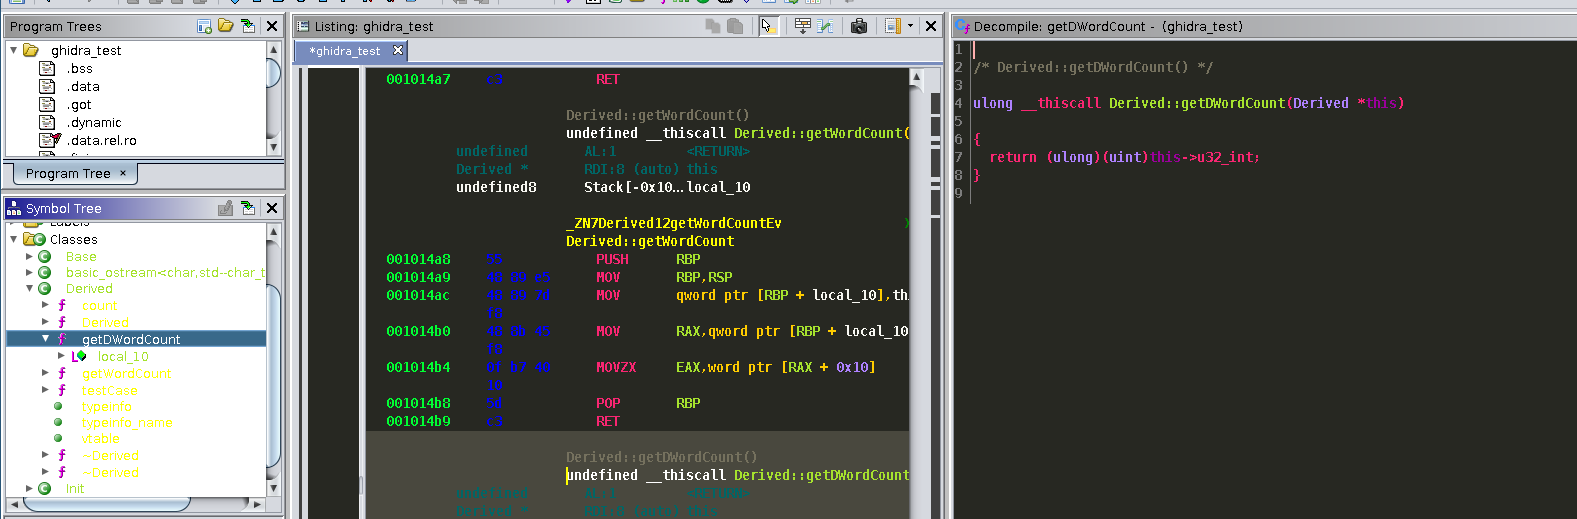
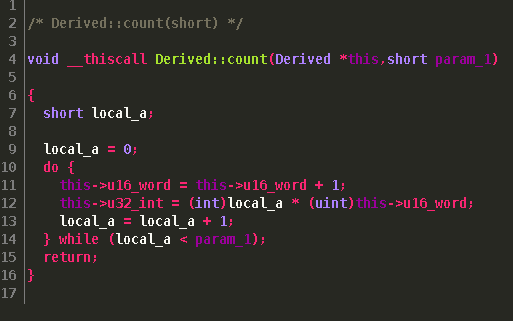
 At this point we are basically finished with this class and VTable. We can then continue with the RE process. An interesting thing I found Ghidra does is attempt to resolve all other "this" pointers with our work. If it is recognized in the constructor calls, or if a function is under the class it will automatically resolve the offsets and make everything look nice. To see an example take a look at the function calls:
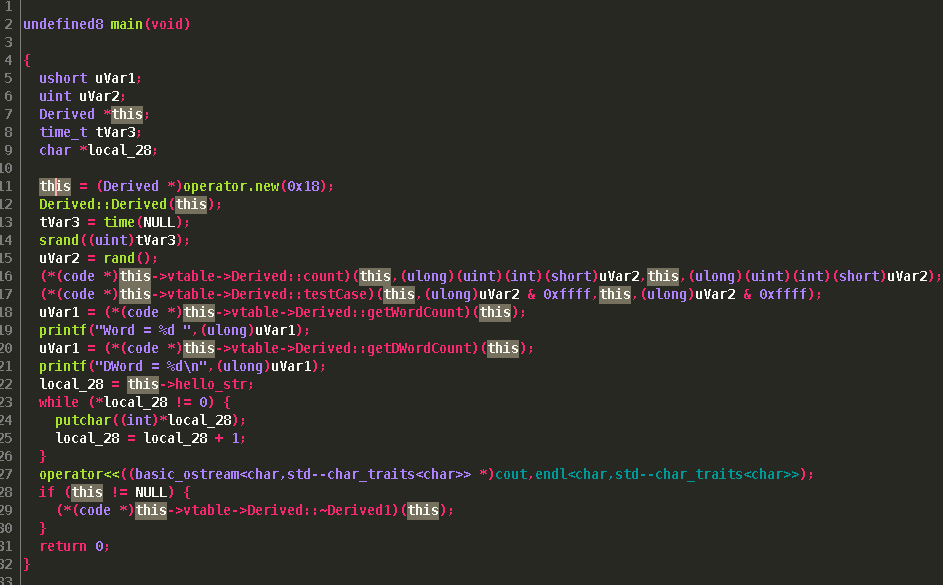
 If we also look back at
 "main()" we see it has also resolved our virtual function calls.
Additional starting information
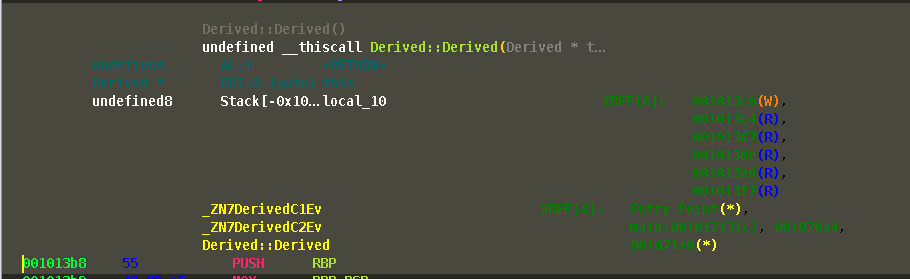
One important need for Software Reverse Engineering is knowing where functions are called. Ghidra handles this by displaying the XRef above the function in the disassembly view. This took me a moment to realize, but I got use to it quickly. There is also another view under "Window->Function Call Graph". In the disassembly view you can jump to the call by double clicking.
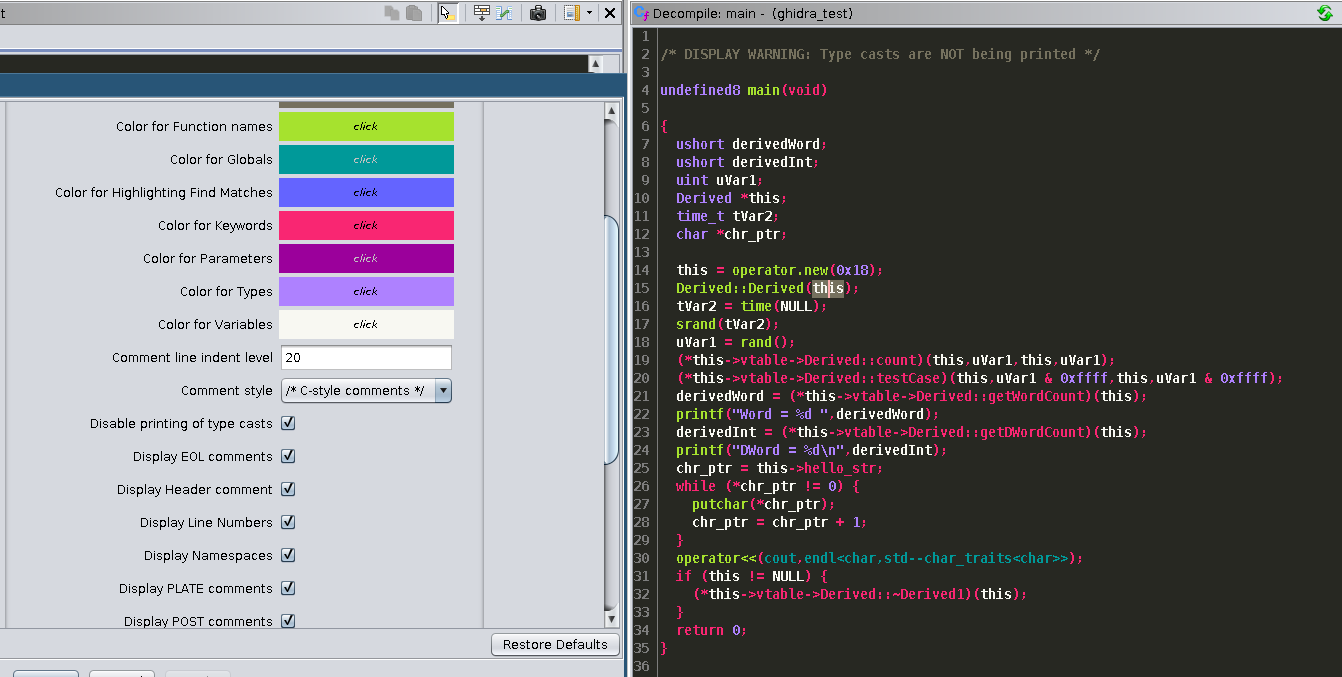
 There is also the option to turn off the casting of types under properties which can further clean up the decompilation:
Conclusion
I initially wanted to do a video on this topic since it will likely convey the material here better. I still might do that, but it will take some effort in my part setting up my recording software and equipment so it might take a couple of weeks. While this guide is not meant to be a comprehensive guide into every feature available in Ghidra, I think it does give you a good starting point to setup a project and view on it's capabilities. In my opinion, Ghidra is the most feature rich tool out of the free or demo tools available for software reverse engineering. Ghidra being free and open source will be great for introducing beginners to RE. While it might not be an immediate replacement for experienced researchers who have years of experience with other tools, I think it has great potential to eventually be a replacement. It think it will also require HexRays and Vector35 to up their game on the features they provide in order to stay competitive, especially if a plugin community of developers for Ghidra exists. For a more in-depth how to and supplementary content view the guide in the docs under ghidra_9.0/docs/GhidraClass.